


Introduction
Applying a decal to a car is a rewarding and creative way to personalize your vehicle, making it stand out on the road. Whether you’re looking to add a touch of personality, advertise your business, or simply. Enhance the aesthetics of your ride, mastering the art of decal application is key. This process may seem daunting at first. But with the right tools, patience, and attention to detail. You can achieve professional-looking results.
Before you embark on this journey, gather the necessary materials: a clean and dry car surface, the chosen decal, masking tape, a squeegee or credit card, a spray bottle filled with a water and soap solution, and a measuring tape. Preparation is crucial, so ensure your vehicle is free from dirt, wax, and debris, creating an ideal canvas for the decal.
Explore the meticulous process of applying a decal, from proper positioning to smooth adherence. By following these instructions, you’ll not only safeguard your decal against bubbles and misalignment but also gain the confidence to showcase your individuality on the open road. So, let’s dive into the world of decal application and transform your car into a unique expression of personal style.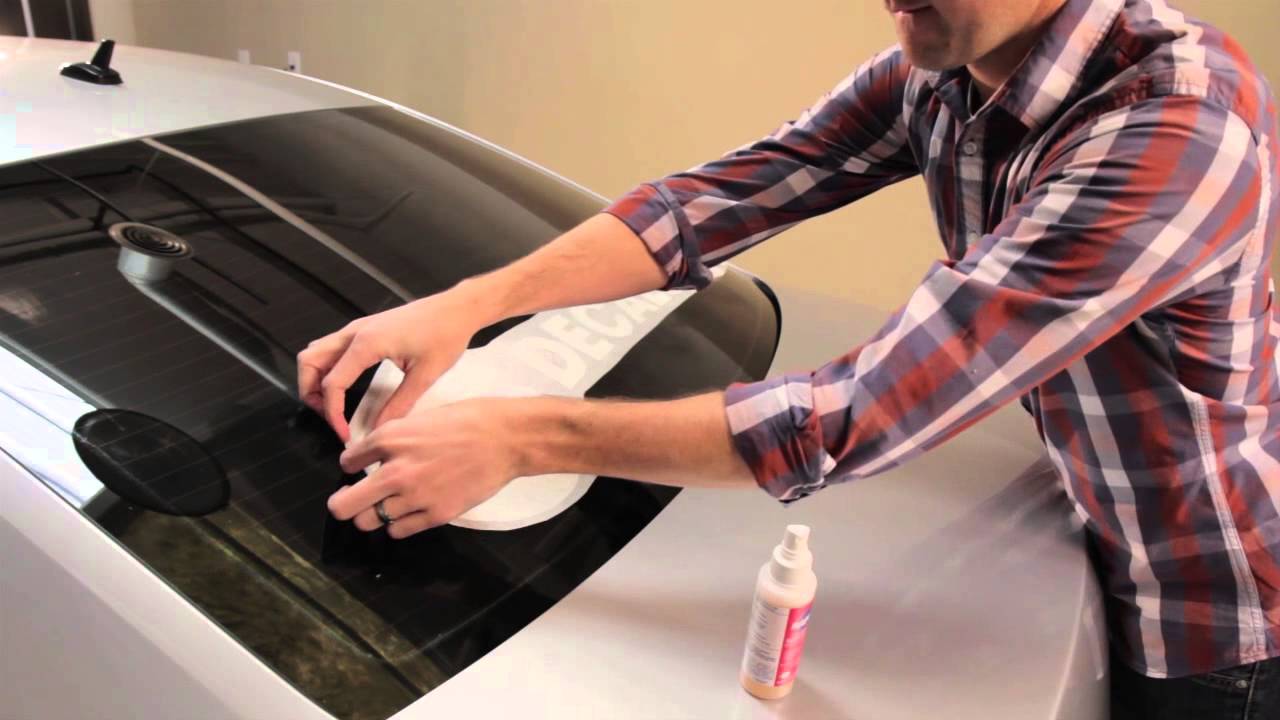
What do you spray when applying decals?
A liquid soap and water solution in a spray mist bottle may be used to aid in positioning and removal of air bubbles (Wet Method). Use overlapping strokes when applying decals to remove all moisture and air-bubbles.
When applying decals, it’s essential to use a water and soap solution to facilitate a smooth and precise application process. This mixture acts as a temporary lubricant, allowing you to reposition the decal and eliminate air bubbles easily. To create the solution, combine a few drops of mild dish soap with water in a spray bottle. The soap reduces surface tension, preventing the decal from sticking immediately and offering you the flexibility to adjust its placement.
This water and soap solution serves multiple purposes during the application process. Firstly, it helps you position the decal accurately by preventing it from adhering permanently until you’re satisfied with the placement. Secondly, it aids in removing any trapped air bubbles or wrinkles, ensuring a seamless and professional-looking result. The lubrication from the solution allows you to use a squeegee or credit card to smooth out the decal, pushing out excess liquid and ensuring a secure bond with the car surface.
How long do car decals last?
When stuck on car windows, bumpers, doors, or elsewhere, vehicle vinyl decals can stay on and retain their quality for up to 5 years. However, it’s important to note that while vinyl does have some resistance against weather elements, constant exposure to sun, rain, snow, and frequent washing can shorten its lifespan.
The longevity of car decals depends on various factors such as the quality of the decal, environmental conditions, and proper application. High-quality vinyl decals, when applied correctly, can withstand the elements and maintain their appearance for an extended period. On average, well-maintained car decals can last anywhere from 3 to 7 years, and sometimes even longer.
Exposure to harsh weather conditions, ultraviolet (UV) rays, and extreme temperatures can affect the lifespan of a car decal. Prolonged exposure to direct sunlight may lead to fading or peeling over time. Additionally, severe weather, such as hailstorms or heavy snow, can impact the integrity of the decal.
Is it better to apply decals wet or dry?
In general, decals without transfer tape applied should always be installed wet, while decals with transfer tape can be installed dry or wet. If the wet method is chosen for a decal with transfer tape, the transfer tape cannot be removed until the decal has completely dried.
The choice between applying decals wet or dry depends on the type of decal and personal preference. Wet application involves using a water and soap solution to temporarily lubricate the decal, allowing for repositioning and easier removal of air bubbles. This method is particularly suitable for larger decals or intricate designs, as it provides more flexibility during the application process.
On the other hand, dry application involves placing the decal directly onto the surface without any liquid. This method is often preferred for smaller decals or simple designs, where precise placement is less critical. Dry application tends to be quicker and simpler, as there’s no need to wait for the decal to dry or squeegee out excess liquid.
How much are decals for a car?
WHAT VEHICLE DECALS COST. A simple car decal option including company logo, website, and phone number can range from $200 to $400 depending on the size of the decals. More complex decal graphics can cost $500+ as seen in the image to the right.
The cost of car decals can vary widely based on factors such as size, design complexity, material quality, and where you purchase them. Generally, basic and smaller decals can range from $5 to $20, while larger or custom-designed decals may cost anywhere from $20 to $100 or more. High-quality vinyl decals tend to be more durable and can withstand different weather conditions, contributing to a higher price point.
It’s advisable to consider your budget, the desired quality of the decal, and the purpose of the application when determining how much to spend. Online marketplaces, local automotive stores, or custom decal shops are common places to explore a variety of options and price ranges. Ultimately, the price of car decals is a dynamic aspect that depends on your preferences and the unique features of the decal you choose.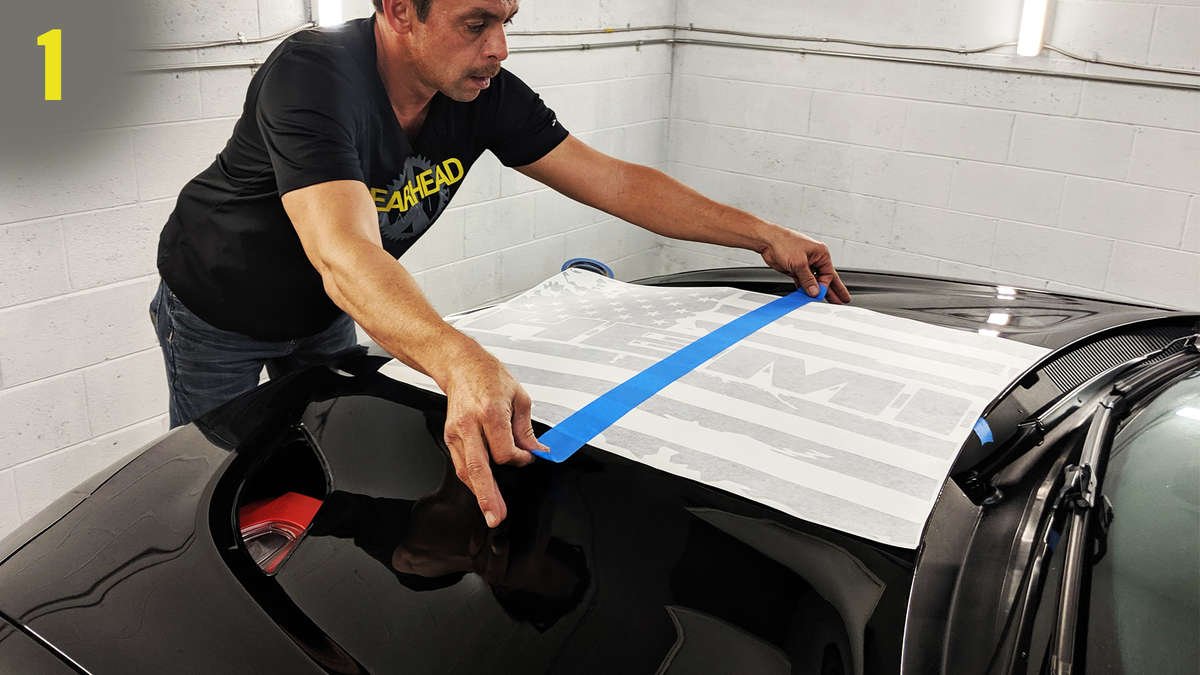
How to make your own car decals?
The Free-Hand Procedure With a Design
-
Print out the image you want on regular paper.
-
Using a pencil, cover the back of the design in lead to help you see the picture.
-
With the lead surface down on the vinyl, trace your picture.
-
Cut the decal from the vinyl with a knife, making sure to make cuts over a cutting mat.
Creating your own car decals can be a rewarding and personalized endeavor. To make your own car decals, you’ll need some essential materials and follow a step-by-step process.
Gather Materials:
Acquire adhesive vinyl sheets, a cutting mat, a craft knife or vinyl cutter, transfer tape, a squeegee, and design software (such as Adobe Illustrator or a vinyl cutting software).
Design Your Decal:
Use the design software to create your desired decal. Consider the size, shape, and intricacy of your design. Keep it simple for easier cutting and application.
Prepare the Vinyl Sheet:
Place the vinyl sheet on the cutting mat. Ensure the material is secure and flat to prevent errors during cutting.
Cutting the Decal:
Use the craft knife or vinyl cutter to precisely cut out your design from the vinyl sheet. Take your time to ensure clean edges and accurate cuts.
Weeding:
Remove the excess vinyl around your design using a process called weeding. This leaves only the desired decal on the backing paper.
Are decals good for cars?
Vinyl stickers are safe for most surfaces of your car. Temporary vinyl will not damage your windows or your paint, but it won’t last very long exposed to the elements.
Decals can be an excellent addition to cars for various reasons, offering both aesthetic appeal and functional benefits. Here are some reasons why decals are considered good for cars:
Personalization: Car decals provide a unique way to personalize and express individual style. Whether it’s showcasing hobbies, interests, or personal messages, decals allow car owners to make their vehicles stand out.
Advertising and Branding: Decals are widely used for business purposes, serving as a cost-effective way to advertise products or services. Company logos and contact information can be prominently displayed, turning the vehicle into a mobile billboard.
Easy Application and Removal: High-quality decals are relatively easy to apply and remove, allowing for flexibility in design changes or updates. They are a non-permanent modification, making them suitable for those who want to experiment with different looks.
Protection: Certain types of decals, like clear protective films, can safeguard the car’s paint from scratches, stone chips, and other minor damages. This helps maintain the vehicle’s resale value and appearance.
Affordability: Compared to custom paint jobs or other modifications, decals are a more budget-friendly option for enhancing a car’s appearance.
What is the first step before applying decals?
Step 1: Surface prep (the MOST important part)
The first step is to prepare the surface you wish to apply the sticker to so that no dirt, dust, grease or residue remains. Be sure to completely remove any waxes, gloss protectors or enhancers before you install, as these will all prevent adhesion to the surface.
Before applying decals to a surface, it is crucial to thoroughly clean and prepare the area. The first step involves cleaning the surface to ensure it is free from dust, dirt, wax, and any other contaminants that might hinder the decal’s adhesion. Here’s a detailed breakdown of the initial steps:
Clean the Surface: Use a mild detergent or soap solution to clean the surface where you intend to apply the decal. Remove any dirt, grease, or wax that may be present. Pay special attention to the edges and corners.
Dry the Surface: After cleaning, allow the surface to dry completely. A dry surface is essential for the decal to adhere properly.
Check for Imperfections: Inspect the surface for any imperfections, such as scratches or dents. Smooth out irregularities if possible, as a smooth surface ensures better adhesion.
Measure and Mark: Before applying the decal, use a measuring tape and masking tape to mark the desired placement. This step helps ensure proper alignment and positioning of the decal.
How do you prepare car paint for decals?
Clean the vehicle using a 50/50 mixture of water and isopropyl alcohol, and be sure to use lint-free rags. Use one rag to apply the alcohol, and another to dry. If the vehicle is really dirty, you might consider washing the car first with soap and water, then cleaning with the 50/50 mix.
Properly preparing car paint is a crucial step to ensure the successful adhesion and longevity of decals. Start by thoroughly cleaning the car’s surface with a mild detergent or automotive soap to remove any dirt, grease, or wax. Use a sponge or soft cloth to avoid scratching the paint. After cleaning, rinse the surface with water and allow it to dry completely. Next, inspect the paint for any imperfections such as scratches, dents, or uneven areas. If needed, address these issues by smoothing out the surface with fine-grit sandpaper and a gentle touch. Afterward, wipe the surface with a clean, lint-free cloth to remove any remaining dust or debris. 
Conclusion
Applying a decal to a car is a rewarding and creative process that allows individuals to express their unique style and preferences. The key to a successful application lies in meticulous preparation and attention to detail. Initiating the process by thoroughly cleaning and preparing the car’s surface ensures optimal adhesion and a polished final result. The choice between wet and dry application methods depends on the size and complexity of the decal, with wet application offering greater flexibility for larger or intricate designs.
Utilizing a water and soap solution, along with essential tools like a squeegee, aids in the smooth and bubble-free placement of the decal. Whether personalizing the vehicle for aesthetic reasons, advertising a business, or incorporating protective elements, decals contribute to the individuality and character of the car. Regular maintenance and careful consideration of environmental factors further enhance the longevity of the decal. Overall, mastering the art of decal application transforms a car into a unique canvas, reflecting the owner’s personality and making a distinct statement on the road.


