


Introduction
Troubleshooting electrical issues in a car can be a daunting task, especially when confronted with the mysterious and elusive electrical short. An electrical short, often manifested as a sudden malfunction or persistent fuse blowing, can wreak havoc on a vehicle’s systems, leaving even seasoned car enthusiasts scratching their heads. In this guide, we will delve into the intricacies of identifying and locating electrical shorts in a car, offering a comprehensive roadmap for both novices and experienced mechanics alike.
Understanding the anatomy of a vehicle’s electrical system is paramount in this pursuit. From the intricate web of wires and connectors to the myriad components powered by electricity, unraveling the complexities requires a methodical approach. We will explore common signs and symptoms of electrical shorts, providing insight into the diagnostic process. Armed with knowledge, you will learn to employ systematic techniques, such as using multimeters and circuit testing, to trace and pinpoint the elusive short circuit.
As we embark on this journey, we’ll demystify the art of finding electrical shorts, empowering you to navigate the labyrinth of wires with confidence. Whether you’re a DIY enthusiast or a professional mechanic, mastering the art of tracing electrical shorts is an invaluable skill, ensuring the uninterrupted and efficient performance of your vehicle. Join us as we illuminate the path to uncovering electrical gremlins and restoring automotive electrical systems to their optimal functionality.
How do you diagnose electrical problems in a car?
If you notice your headlights, interior lights, or dashboard lights dimming or flickering, it could indicate an electrical issue. Dim lights may suggest a failing alternator or a weak battery, while flickering lights could indicate loose wiring connections.
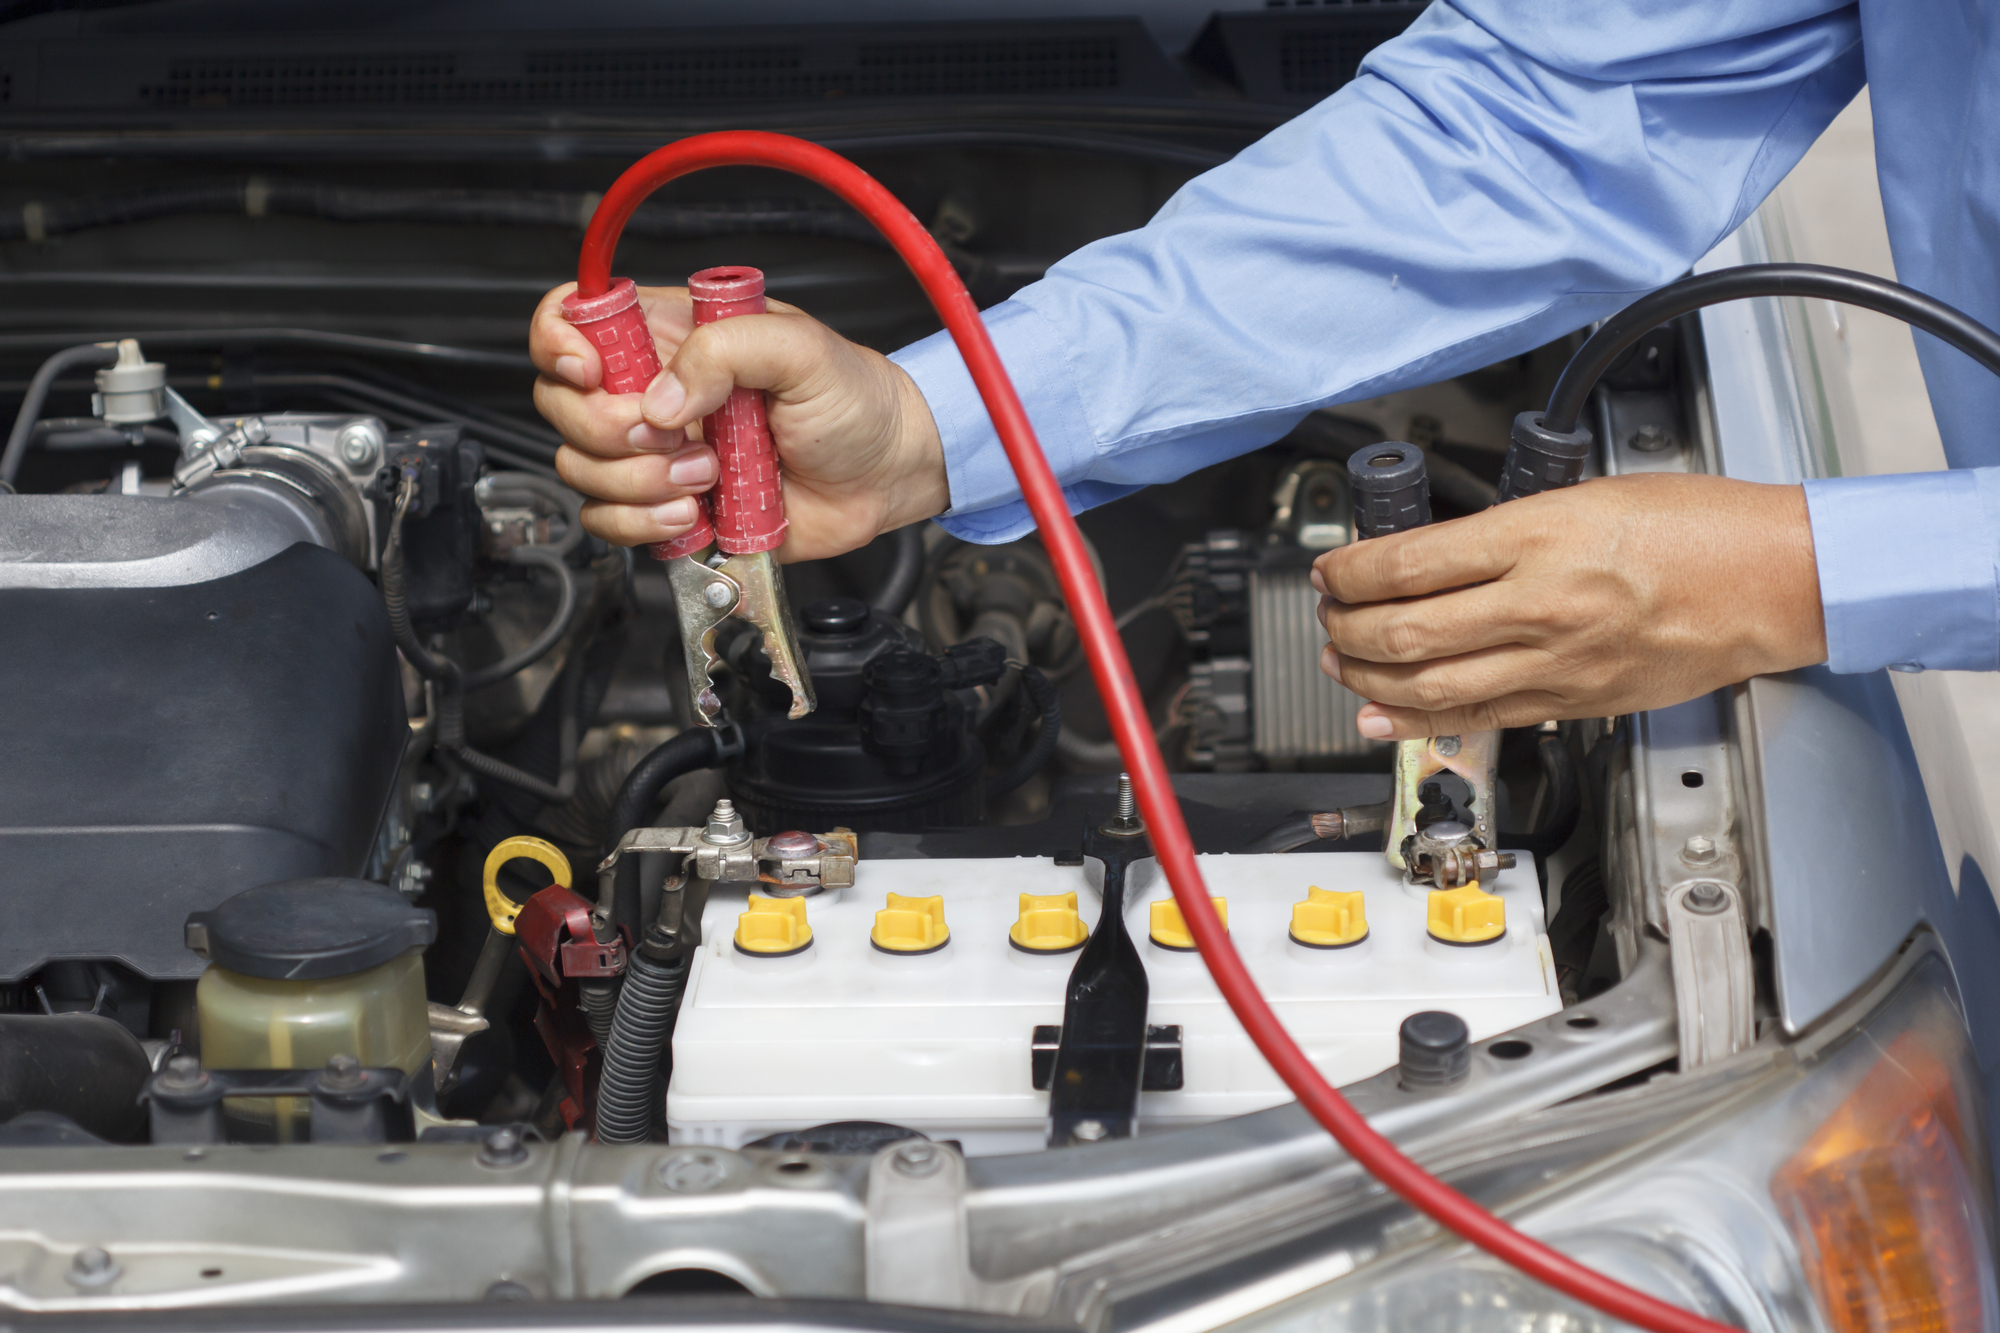
Diagnosing electrical problems in a car requires a systematic approach and a basic understanding of automotive electrical systems. Start by inspecting the vehicle’s battery for any visible signs of corrosion, loose connections, or a discharged state. A multimeter can be used to measure voltage and ensure the battery is providing sufficient power.
Next, examine the vehicle’s fuses and relays. A blown fuse or a faulty relay can disrupt electrical circuits, causing various issues. Use the owner’s manual to locate and inspect these components.
Moving on, check the alternator for proper functionality. The alternator charges the battery and powers electrical systems while the engine is running. A failing alternator may lead to dimming lights or a discharged battery.
A diagnostic scan tool can be invaluable for identifying issues within the car’s onboard computer system. It can retrieve error codes and provide insight into specific electrical malfunctions.
If the problem persists, a visual inspection of wiring and connections is crucial. Look for damaged or frayed wires, loose connections, or burnt components. A wiring diagram for the specific vehicle can aid in tracing the circuits and identifying potential trouble spots.
In more complex cases, seeking professional help from a qualified mechanic or an auto electrician may be necessary. Their expertise and specialized tools can efficiently pinpoint and resolve intricate electrical problems in the car.
How do you trace an electrical short?
In terms of troubleshooting, identifying a short circuit is usually easier than finding an open circuit. A short circuit can be detected by using a multimeter to measure the resistance between two points in the circuit. If the resistance is very low or zero, it indicates a short circuit.
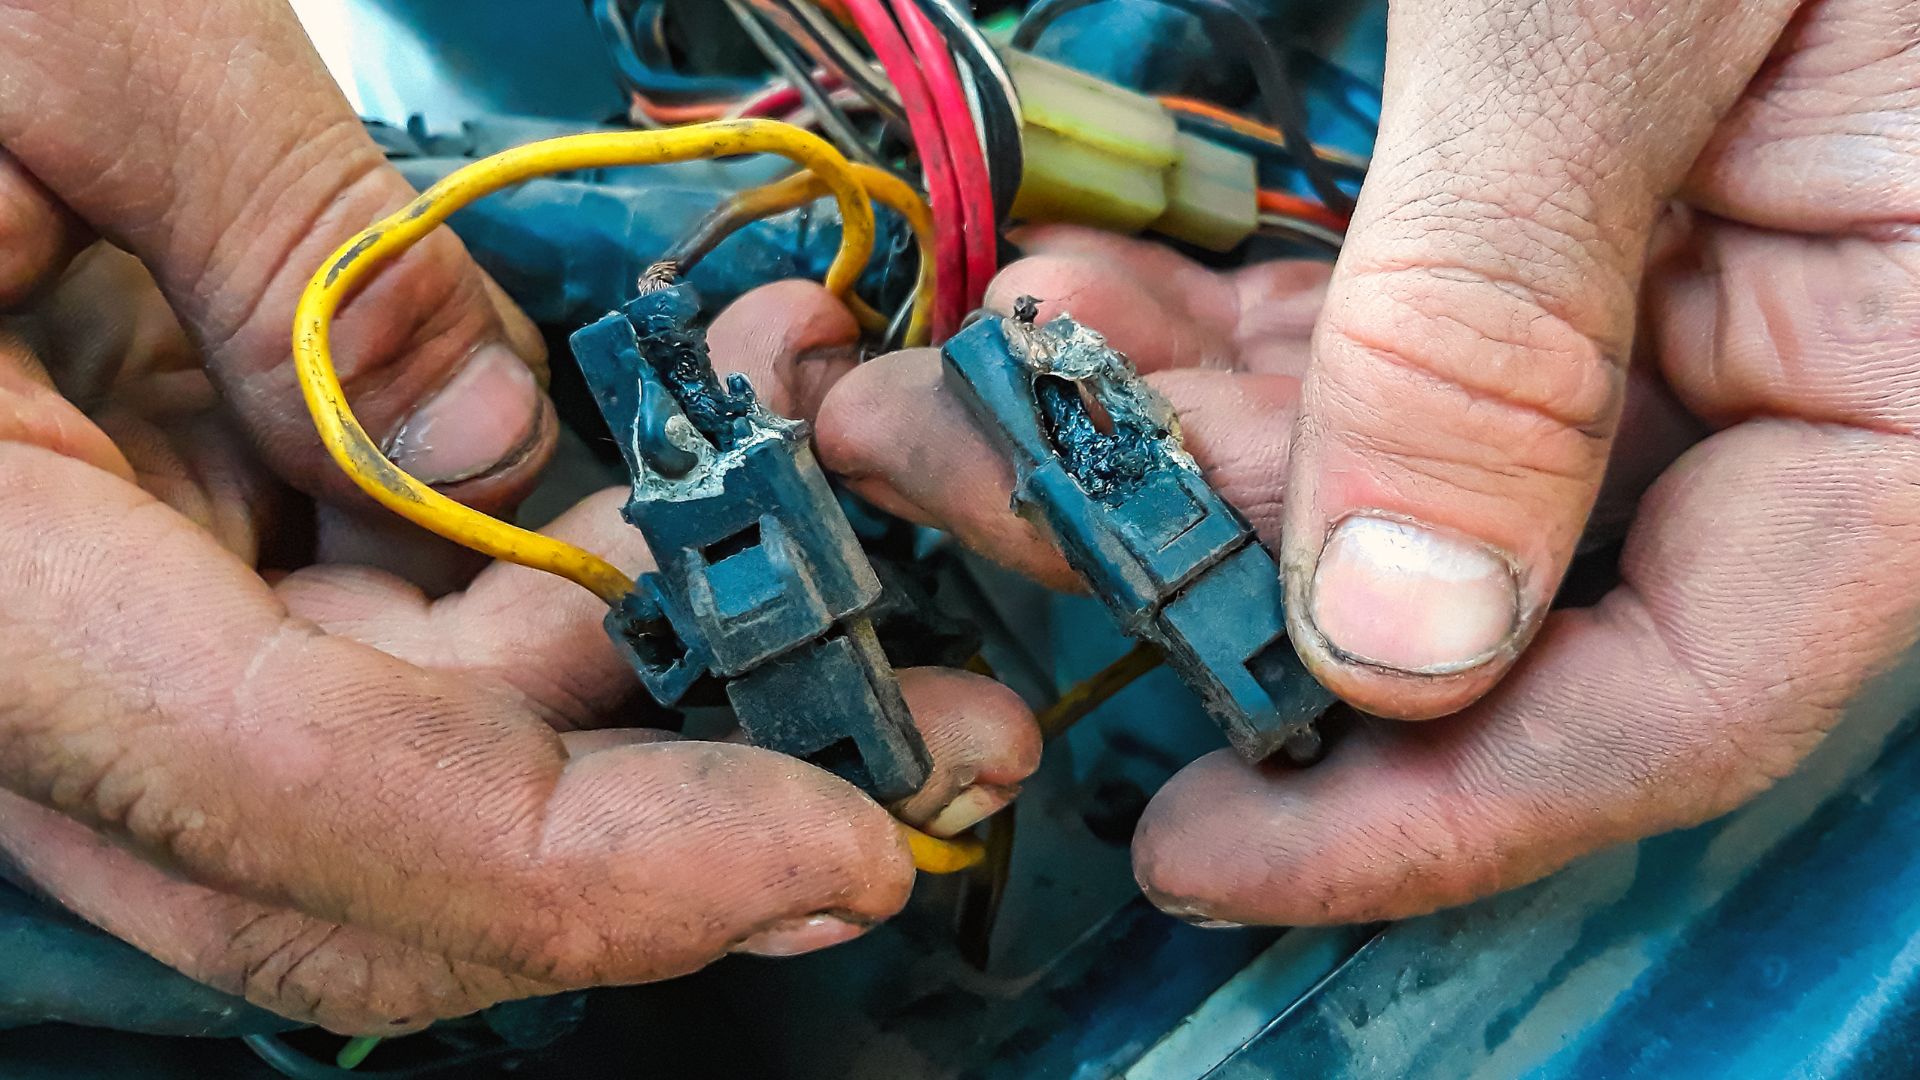
Tracing an electrical short can be a challenging yet crucial task in troubleshooting electrical systems. An electrical short occurs when an unintended connection is established between two conductive elements, leading to a disruption in the normal flow of electricity. To trace a short circuit, start by disconnecting power to the affected circuit to ensure safety. Employ a multimeter to measure resistance and identify the location of the short.
Begin by inspecting the wiring and components for any visible damage, such as frayed wires or burnt insulation. Check for loose connections or damaged insulation that may be causing a short. Utilize the multimeter in continuity mode to identify the point where the short circuit is occurring by testing different segments of the circuit.
Isolate sections of the circuit systematically, testing each segment until the short is located. Pay close attention to areas with high wear and tear, such as junction boxes or connectors. If the short is elusive, consider using a circuit tracer tool or thermal imaging to identify abnormal heat signatures that may indicate a fault.
Successfully tracing an electrical short requires a systematic approach, attention to detail, and the proper tools. Once the short is identified and rectified, restore power cautiously and verify that the issue is resolved.
How do you check electrical shorts?
The first step in finding a short circuit is to look for physical signs. This may include visible burns or melted metal on wires, burning smells, or flickering lights. Once you’ve identified a potential short, use your multimeter to confirm the voltage by placing it on its resistance or continuity setting.
To identify shorts, follow these steps:
Safety First: Before starting, ensure the power is turned off and disconnect the circuit from the power source. Use appropriate personal protective equipment like gloves and safety goggles.
Visual Inspection: Examine the wiring for any visible signs of damage, such as frayed wires, exposed conductors, or burnt areas. Check electrical components for anomalies.
Multimeter Testing: Set the multimeter to the resistance or continuity mode. Connect one probe to a known ground point and the other to the suspected points in the circuit. A reading of zero or very low resistance indicates a short.
Isolation Testing: Divide the circuit into sections and test each segment separately. This helps pinpoint the location of the short.
Insulation Resistance Testing: Verify the insulation resistance using a megohmmeter. Low insulation resistance can indicate a short circuit.
Thermal Imaging: In some cases, a thermal camera can identify hotspots caused by electrical shorts.
Circuit Breaker Tripping: If a circuit breaker trips repeatedly, it may be due to a short. Identify the circuit causing the tripping and investigate.
What is the most common electrical problem in a car?
Dead bar battery
This is one of the most common car electrical issues drivers have. This issue is not hard to spot because your vehicle’s engine will not turn over when you turn your key.
The most common electrical problem in a car typically revolves around issues with the battery. A car’s battery is a critical component that provides the necessary power to start the engine and run various electrical systems. Over time, batteries can degrade or lose their charge, leading to difficulties in starting the vehicle. Corroded or loose battery terminals are also frequent culprits, disrupting the flow of electricity.
Faulty alternators rank as another prevalent electrical concern. The alternator is responsible for charging the battery while the engine runs. When it malfunctions, the battery can’t maintain its charge, resulting in a drained battery and potential stalling.
Damaged or worn-out spark plugs and ignition coils are common electrical issues affecting engine performance. These components play a crucial role in the combustion process, and when compromised, they can cause misfires, poor fuel efficiency, and difficulty in starting the car.
Electrical problems can manifest in various forms, from flickering lights to malfunctioning power windows. Identifying and addressing these issues promptly is essential to ensure the reliable performance of a vehicle’s electrical system. Regular maintenance, timely battery checks, and professional diagnostics can help prevent and resolve these common electrical challenges in cars.

How do I know if my car has electrical damage?
Signs of changes to the electricity supply in the car, like lights that dim and then get bright. Electrical components (e.g., the radio or windows) losing power. Your vehicle is stalling. A jump-start won’t restart it.
Identifying electrical damage in your car is crucial for ensuring both safety and optimal performance. Several signs may indicate potential electrical issues. Firstly, pay attention to warning lights on your dashboard. Persistent illumination of the check engine light, ABS light, or other warning indicators suggests electrical problems.
Unusual sounds or smells can also point to electrical issues. If you notice strange noises, such as buzzing or clicking, or detect a burning odor, it could indicate a problem with the electrical system. Keep an eye on your vehicle’s overall performance – sluggish starting, flickering lights, or dimming headlights may signify electrical trouble.
Inconsistent electrical functions, such as malfunctioning power windows, door locks, or erratic behavior from the radio or infotainment system, may also indicate underlying electrical issues. Check for blown fuses, as they often signify a short circuit or other electrical malfunction.
Finally, if you experience repeated battery failures or find corrosion around the battery terminals, it could be a sign of electrical problems. Regularly inspecting your car, staying alert to these signs, and promptly addressing any concerns with a professional can help prevent further damage and ensure the electrical system’s reliability.
How do you fix an electrical problem in a car?
Check the fuses– If only one or two electrical components aren’t working, it might be a blown fuse. Check your owner’s manual to find the location of the fuse box and the specific fuse that’s related to the problem. Use a fuse tester to check the fuse – if it’s blown, replace it with a new one.
Fixing an electrical problem in a car requires a systematic approach to identify and address the issue effectively. Begin by checking the basics, such as ensuring the battery is fully charged and the terminals are clean and secure. Next, inspect the fuses in both the engine compartment and the interior fuse box, replacing any blown fuses with ones of the same amperage.
If the issue persists, move on to examining the wiring for any visible damage or loose connections. A multimeter can be a valuable tool for testing voltage and continuity along the circuits. Pay special attention to grounds, as poor grounding can lead to electrical malfunctions.
For more complex problems, consult the vehicle’s wiring diagram to trace the specific circuit related to the issue. Electronic diagnostic tools, such as OBD-II scanners, can help identify trouble codes and pinpoint the source of the problem. If you’re unsure or uncomfortable with electrical work, seeking professional assistance is advisable.
Remember to prioritize safety by disconnecting the battery before working on any electrical components. Patience and a methodical approach are key when troubleshooting and fixing electrical problems in a car.
How do you trace a bad electrical circuit?
There are a few handy tools that can help trace electrical wiring. Readily available and simple to use, these include: Stud Finder: A device that emits a small electrical or magnetic field to detect changes due to denser areas of the wall or metal nails. Depending on the unit, it may detect wires behind walls too.
Tracing a bad electrical circuit is crucial for identifying and resolving issues within a system. When confronted with electrical problems, a systematic approach is essential. Begin by turning off the power to the circuit at the breaker or fuse box to ensure safety. Next, use a multimeter to check for continuity in the circuit, testing both ends of the wires and components. A sudden drop in voltage indicates a potential issue.
Visual inspection is equally important; look for frayed wires, burnt components, or signs of overheating. Pay attention to any unusual smells, as they can also pinpoint electrical malfunctions. If the circuit includes outlets or switches, inspect them for loose connections or signs of damage.
The process may involve isolating sections of the circuit and testing each part individually to identify the problematic area. Check for loose connections, damaged insulation, or faulty components. In some cases, a circuit diagram can be immensely helpful in understanding the system’s layout and identifying potential trouble spots.
Patience and a methodical approach are key when tracing bad electrical circuits. If the issue remains elusive, seeking professional assistance is advisable to ensure a safe and accurate resolution.
Can cars short circuit?
If you have a car battery that leaks acid, it can create a short circuit. Or if you have a metal tool in your car and it comes into contact with an exposed wire, that can cause a short circuit too. A short circuit can cause your car to stall. It can cause your car to overheat and emit sparks.
Cars can experience short circuits, typically resulting from electrical malfunctions or damaged wiring within the vehicle’s electrical system. A short circuit occurs when a current deviates from its intended path due to a direct connection between two points with varying electrical potentials. Several factors can contribute to car short circuits, including worn-out insulation, water infiltration, corrosion, or faulty components.
Water is a common culprit in car short circuits, as it can penetrate the electrical system through damaged seals or connections, causing a disruption in the circuit. Corrosion can also play a role, particularly in older vehicles where metal components may degrade over time.
Modern cars are equipped with sophisticated electrical systems, and a short circuit can lead to various issues, ranging from malfunctioning lights and accessories to more severe consequences like electrical fires. Regular maintenance, timely repairs, and addressing any signs of electrical problems can help prevent short circuits in cars. It is advisable to seek professional assistance if you suspect a short circuit or experience electrical issues in your vehicle to ensure safe and reliable operation.
Conclusion
Identifying and resolving electrical shorts in a car is a critical skill for maintaining vehicle safety and performance. The process requires a systematic and patient approach, starting with a thorough inspection of the electrical system and its components. By utilizing a multimeter, visual inspections, and a methodical disconnect-and-test strategy, individuals can narrow down the search for the elusive short circuit.
The importance of safety cannot be overstated during this process, as electrical systems pose inherent risks. Patience and attention to detail are key virtues, as locating a short may demand time and precision. Collaborating with professional technicians or seeking guidance from reputable resources can enhance one’s understanding and increase the likelihood of a successful diagnosis.
Ultimately, the ability to find electrical shorts empowers car owners to address issues promptly, preventing potential hazards and avoiding extensive damage to the vehicle’s electrical components. This skill not only saves time and money but also contributes to overall road safety. In an era where technology is integral to automotive functionality, mastering the art of detecting electrical shorts is an invaluable skill for any car enthusiast or DIY mechanic.


