Introduction
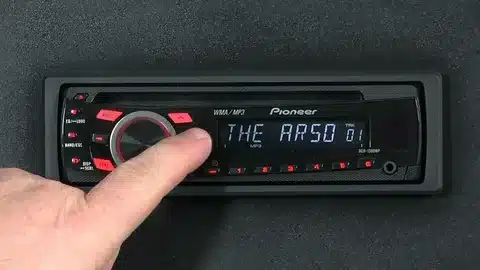
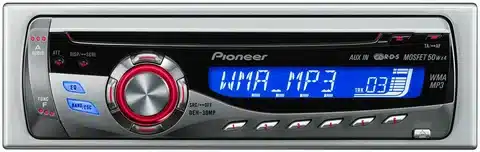
How To Set Clock On Pioneer Car Stereo Wma/Mp3: Setting the clock on a Pioneer car stereo with WMA/MP3 playback capability is an essential task for any vehicle owner or driver. Having an accurate time display not only helps you stay punctual but also ensures that your car audio system functions smoothly, particularly when it comes to features like scheduled radio programming or navigation. In this guide, we will walk you through the steps to set the clock on your Pioneer car stereo with WMA/MP3 support, making the process easy and hassle-free. Whether you’re a tech-savvy individual or new to car audio systems, you’ll find the instructions here straightforward and helpful. So, let’s get started and ensure that your Pioneer car stereo displays the correct time every time you hit the road.
Setting the clock on a Pioneer car stereo with WMA/MP3 playback functionality is an important task for car owners and enthusiasts who want to keep their audio system synchronized with the correct time. A correctly set clock not only helps you stay on schedule but also ensures that features like scheduled radio programs and navigation work seamlessly. In this guide, we will provide you with easy-to-follow instructions on how to set the clock on your Pioneer car stereo, allowing you to maintain precise timekeeping while enjoying your music on the road. Whether you’re experienced with car audio systems or new to the process, these steps will help you navigate the clock-setting feature effortlessly and make your driving experience more convenient and enjoyable. Let’s get started.
Setting the clock on a Pioneer car stereo with WMA/MP3 playback capability is a fundamental task for vehicle owners who rely on accurate timekeeping while on the road. Your car stereo serves not only as an audio entertainment system but also as a convenient timekeeping device. In this guide, we will provide you with step-by-step instructions on how to set the clock on your Pioneer car stereo, ensuring that you can easily keep track of time during your journeys. Whether you’re a seasoned car audio enthusiast or a novice, these instructions will help you navigate the process smoothly and efficiently. Let’s get started and ensure that your Pioneer car stereo displays the correct time with ease.
How does a car clock work?
The clocks are run through a set of contact points wired in series with the solenoid coil. As the clock runs, an arm with one contact point moves closer to its mating contact. The design is such that it allows the points to close, completing the circuit before the spring winding runs down.
A car clock is a simple yet essential component of a vehicle’s interior, providing occupants with a convenient way to keep track of time while on the road. Its operation relies on basic principles of timekeeping and electronics.
Most car clocks are digital and are integrated into the car’s dashboard. They typically utilize a quartz crystal oscillator, which is incredibly accurate in keeping time. When the car is running or the ignition is turned on, a small electrical current is supplied to the quartz crystal. This current causes the crystal to vibrate at a precise frequency, usually 32,768 times per second. This consistent oscillation serves as the fundamental timekeeping mechanism.
The vibrations from the quartz crystal are then divided down into seconds, minutes, and hours by an electronic circuit. This circuit counts the oscillations and translates them into a readable time format. The display, often an LED or LCD screen, shows the time in hours and minutes. Some car clocks also include features like AM/PM indicators and date displays.
Power for the clock is typically drawn from the car’s electrical system, so it continues to run even when the engine is turned off. This way, the car clock remains accurate and helps occupants stay on schedule, making it a valuable and unassuming component of the modern vehicle interior.
What is the standard MP3 setting?
The MP3 format can range from around 96 to 320Kbps, and streaming services like Spotify range from around 96 to 160Kbps. High bit rates appeal to audiophiles, but they are not always better. Keep in mind how your digital audio is going to have to contend with bottlenecks.
The standard MP3 setting, also known as the default or common setting, refers to the most widely used parameters and configurations for encoding audio files in the MP3 format. MP3, short for MPEG-1 Audio Layer 3, is a popular digital audio compression format known for its balance between audio quality and file size.
The standard MP3 setting typically includes the following specifications:
Bitrate: The most common bitrate for standard MP3 files is 128 kbps (kilobits per second). This bitrate offers a good compromise between audio quality and file size, making it suitable for a wide range of applications, including music streaming, portable media players, and digital audio libraries.
Sampling Rate: The standard sampling rate for MP3 files is 44.1 kHz, which is the same as that used for CDs. This sampling rate provides excellent audio quality and is the de facto standard for digital audio.
Stereo Channels: Standard MP3 files are often encoded in stereo, which means they have two audio channels (left and right). This stereo configuration is suitable for most music and audio content.
Constant Bitrate (CBR) or Variable Bitrate (VBR): While CBR is more common for standard MP3 files, some may use VBR, which adjusts the bitrate dynamically to maintain consistent audio quality. CBR is simpler and more predictable, while VBR can offer slightly better compression efficiency.
Joint Stereo: Standard MP3 settings may use joint stereo, a technique that combines stereo channels to save space without significantly compromising audio quality.
How do I reset my MP3 player?
If your MP3 player is locked up, try to reset it. Players that have a removable battery require only that you remove the battery for several seconds and then reinsert it. Other players have a reset hole on the device and pressing this with a paper clip or other small pointed object will reset the device.
Resetting your MP3 player can help resolve various issues, such as frozen screens, unresponsive controls, or software glitches. The process to reset an MP3 player varies depending on the make and model, but here’s a general guide:
Check the Manual: First, consult your MP3 player’s user manual or look up the specific instructions for your device online. Different manufacturers and models may have unique reset methods.
Soft Reset: Many MP3 players have a soft reset option, which is usually done by pressing and holding the power or play/pause button for about 10-15 seconds. This action will typically force the player to power off and then restart.
Remove the Battery: If your MP3 player has a removable battery, taking it out for a few seconds and then reinserting it can effectively reset the device. Ensure that the player is powered off before doing this.
Factory Reset: As a last resort, some MP3 players have a factory reset option in their settings menu. This will erase all your data and settings, returning the player to its original state. Be cautious when using this option, as it wipes all content.
Software Tools: Some MP3 player manufacturers offer software tools or firmware updates that can help resolve issues. Visit the manufacturer’s website and follow their instructions for troubleshooting and resetting.
Where is the time set?
Time is set inside a fictional prison, which actually uses a former real life jail. HMP Shrewsbury, located in Shropshire, England, which was put out of use in 2013, is where the drama shot and filmed its prison scenes.
The process for setting the time can vary depending on the device or context you are referring to. Here, we will discuss common scenarios where time is set and how to do it:
Digital Devices (Smartphones, Computers, Tablets): On most digital devices, the time is automatically synchronized with a network or server. However, you can manually set the time in your device’s settings. For example, on a smartphone, go to the “Settings” menu, find the “Date & Time” or “Clock” section, and adjust the time and time zone settings accordingly.
Wristwatches and Clocks: Traditional analog wristwatches and clocks have a small knob or crown on the side that you can pull out and rotate to set the time. Digital wristwatches typically have buttons that allow you to adjust hours, minutes, and sometimes seconds.
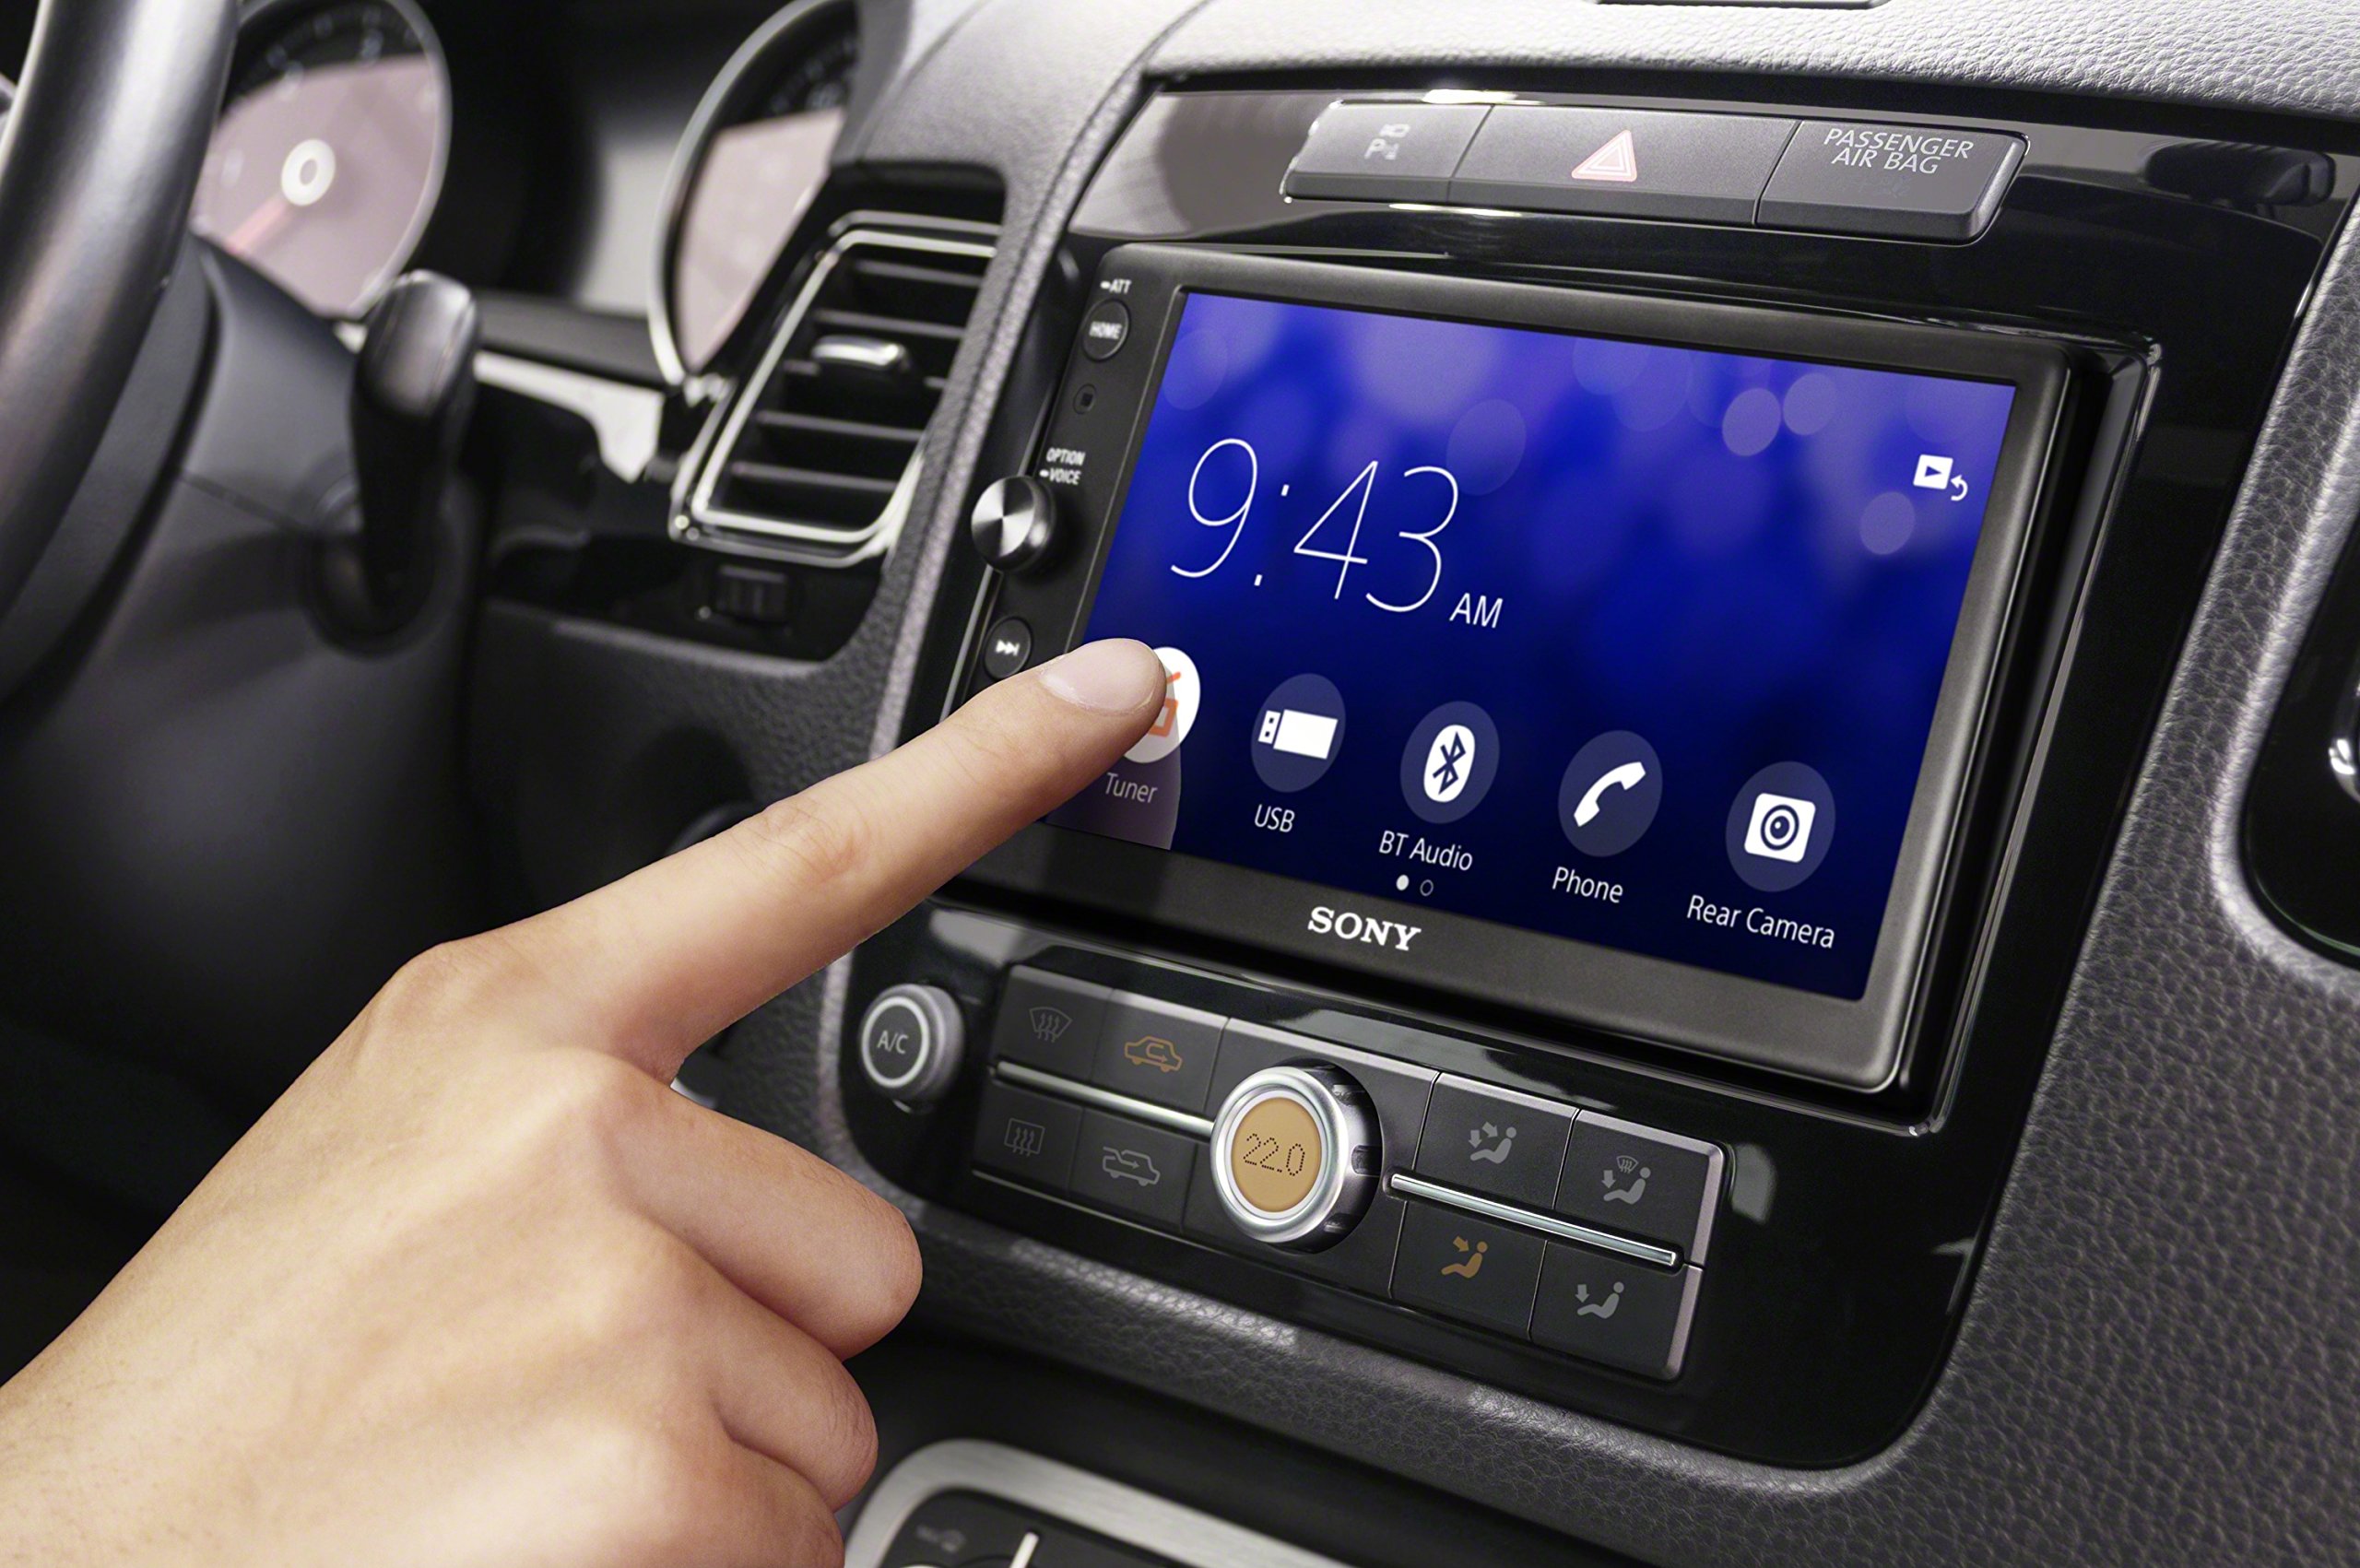
Vehicles: In cars, trucks, and motorcycles, the time is usually set through the vehicle’s dashboard settings. You can typically find this in the infotainment system or the instrument cluster. Refer to your vehicle’s manual for specific instructions, as the process can vary widely.
Household Appliances: Some household appliances, such as ovens and microwaves, have built-in clocks. You can usually set the time using dedicated buttons or a combination of buttons. Refer to the appliance’s user manual for precise instructions.
Home Thermostats: Smart thermostats and programmable thermostats often have time-setting features. You can access these settings through the thermostat’s interface or a connected app.
How do you reset a dual car stereo?
Press the RESET button to reset the unit back to the factory settings if abnormal operation occurs. The reset button is located behind the front panel. With the unit on, press and hold DISP until the clock begins to flash, then release. Press TUNE to adjust the hours and TUNE to adjust the minutes.
Resetting a Dual car stereo is a straightforward process that can help resolve issues like freezing, unresponsiveness, or software glitches. The steps may vary slightly depending on the specific model, but here’s a general guide:
Power Off: Ensure the car stereo is powered off. If it’s not responding, turn off your vehicle’s ignition or disconnect the car battery briefly to power it down completely.
Locate the Reset Button: Dual car stereos often have a small reset button, typically located behind the faceplate or along the bottom edge. Refer to your user manual or check the stereo’s documentation to find the exact location of the reset button for your model.
Press and Hold: Use a thin, pointed object like a paperclip or a pen and press and hold the reset button for about 10-15 seconds. You should feel a slight click when you press the button.
Release the Button: After holding the button for the specified duration, release it.
Power On: Reconnect the car battery or turn on the ignition to power up the car stereo. The reset process should be complete, and the stereo will restart with its default settings.
Reconfigure Settings: Depending on the model, you may need to reconfigure your preferred settings, such as radio presets, audio settings, and clock time.
How do I set the time on my Sony 7000?
Press HOME, select [Settings] [General] [Set Date/Time], then set from [Auto(RDS)] to [Manual]. After that, touch (register/setup) and adjust the clock manually.
Sony produces a wide range of car audio products, and the procedures for setting the time can vary between different models and years of manufacture. To set the time on your Sony car stereo model “7000” or any other Sony car stereo, you’ll need to refer to the user manual that came with your specific device. Here are some general steps that might help you:
Turn on the Car Stereo: Start by turning on your Sony car stereo.
Access the Menu or Settings: Use the controls or buttons on your stereo to access the menu or settings screen. Look for an option related to “Clock,” “Time,” or “Settings.”
Set the Time: Once you’ve entered the clock or time settings menu, you can typically adjust the hours and minutes using the stereo’s controls or knobs. Some models may use a 24-hour format.
Save or Confirm: After setting the correct time, save your changes by pressing an “Enter,” “OK,” or “Set” button, or by following on-screen prompts.
Exit: Exit the clock settings menu to return to the main display.
Can you change the clock on a car?
May seem obvious, but many cars – particularly in this digital age – will have detailed explanations as to which buttons on your dashboard to press to change the clock. Edmunds.com has a pretty exhaustive list of downloadable car manuals to help you with this.
Yes, you can change the clock in your car, and it’s a relatively simple process. Modern vehicles are equipped with digital displays and settings that allow you to adjust the time to match your preferences or accommodate changes such as Daylight Saving Time. Here’s a general guide on how to change the clock in your car:
Consult the Owner’s Manual: Start by checking your vehicle’s owner’s manual. It will provide specific instructions for changing the clock on your car, as different car makes and models have varying procedures.
Access the Clock Settings: Typically, you will need to navigate through your car’s infotainment system or dashboard controls to access the clock settings. This can involve using touchscreen displays, buttons, knobs, or a combination of these.
Adjust the Time: Once you’ve accessed the clock settings, you can adjust the time by incrementing or decrementing the hours and minutes. Some systems also allow you to switch between 12-hour and 24-hour formats or set the time zone.
Save and Confirm: After setting the time correctly, make sure to save your changes by following the on-screen prompts or pressing a “Set” or “Confirm” button. Some systems may automatically save the changes when you exit the menu.
Verify the Time: Double-check that the displayed time now matches your intended setting.
Account for Daylight Saving Time: Remember to update the clock twice a year to account for Daylight Saving Time changes if applicable in your region.
Why is my car clock wrong?
What would cause the clock to reset every time you turn on and off the car? Low voltage at the clock while starting the car. Most likely the car battery is going bad. It is also possible the starter and or battery cables are going bad.
If your car clock is consistently displaying the wrong time, there can be several reasons for this issue. Here are some common factors that can cause your car clock to be incorrect:
Daylight Saving Time: One of the most common reasons for a wrong car clock is the change between Standard Time and Daylight Saving Time (DST). If your car clock doesn’t automatically adjust for DST, you’ll need to update it manually twice a year.
Weak or Dead Battery: A weak or dead car battery can cause the car’s clock to lose power and reset to its default time. If you’ve recently experienced battery issues or had your battery replaced, the clock may need to be reset.
Electrical Problems: Faulty wiring or electrical issues in your vehicle can affect various components, including the clock. If there’s a problem with the electrical system, it can lead to inaccuracies in the clock display.
Vehicle Age: Older vehicles with analog or mechanical clocks are more prone to time inaccuracies due to wear and tear. These clocks may require periodic adjustment or maintenance.
Infotainment System Updates: If your car has an infotainment system with a digital clock, software updates or glitches can sometimes affect the clock’s accuracy. Updating the system’s firmware may resolve this issue.
Manual Adjustment: Sometimes, drivers or passengers may accidentally or unknowingly change the time on the car clock, leading to inaccuracies.

Conclusion
Setting the clock on your Pioneer car stereo with WMA/MP3 playback is a straightforward process that allows you to maintain accurate timekeeping while on the road. By following the step-by-step instructions provided in this guide, you can ensure that your car audio system displays the correct time effortlessly, making it easier to plan your journeys and synchronize your activities with precision. Whether you’re a tech-savvy enthusiast or a newcomer to car audio systems, these instructions will help you navigate the clock-setting procedure with confidence, ensuring that your Pioneer car stereo serves as a reliable timekeeping device in addition to its audio entertainment capabilities.
Remember that the specific steps for setting the clock on your Pioneer car stereo may vary depending on the model and year of manufacture. Therefore, it’s essential to consult your car stereo’s user manual for model-specific instructions if you encounter any difficulties or if the general steps provided in this guide do not apply to your particular stereo.
Setting the clock is a simple yet essential task that ensures you have accurate time information while driving, which can be crucial for punctuality and coordination. It’s also a way to make the most of your car stereo’s functionality, as many modern systems incorporate time-related features like scheduled programming or navigation synchronization. Whether you’re setting the clock in a basic or advanced Pioneer car stereo, these instructions will help you maintain precise timekeeping in your vehicle.