Introduction
How To Fix Sagging Roof Lining In Car: The sagging roof lining in a car is a common issue that many vehicle owners may encounter over time. This deterioration often manifests as the fabric or material lining the interior roof of the car begins to detach and droop, creating an unsightly and potentially inconvenient problem. While this cosmetic concern doesn’t directly impact the vehicle’s performance, it can be bother some and compromise the overall aesthetics of the interior. Fortunately, fixing a sagging roof lining is a task that can be undertaken with some DIY efforts, saving car owners the expense of professional repairs.
Understanding the causes of a sagging roof lining is essential before delving into the repair process. Over time, the adhesive that holds the roof lining material in place may weaken due to factors like temperature variations, humidity, or age. Exposure to sunlight can also contribute to the breakdown of the adhesive, leading to the sagging effect. With a range of potential causes, finding a suitable solution involves not only repairing the immediate issue but also addressing the factors that contributed to the problem.
DIY solutions for fixing a sagging roof lining abound, offering car owners cost-effective alternatives to professional repairs. These solutions often involve reattaching the lining material to the roof using appropriate adhesives or tapes. While the process itself may seem straightforward, attention to detail and patience are crucial to achieving a lasting and aesthetically pleasing result. This guide will explore various methods and tips for fixing a sagging roof lining, empowering car owners to restore the interior of their vehicles and enhance the overall driving experience.
How do you fix a sagging roof liner on a car?
For a saggy middle piece of fabric, park the car in the sun to gently warm the interior. Then, use a steamer or an iron to heat the material (and hopefully reactivate the glue). Lightly push the fabric onto the support board. Use a wide piece of cardboard or a paint roller to smooth the fabric onto the backing.
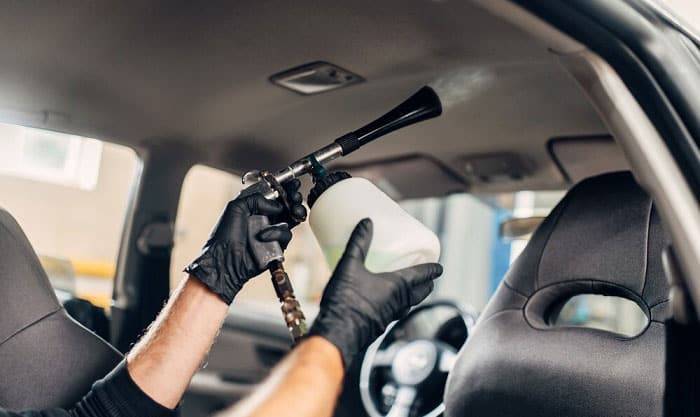
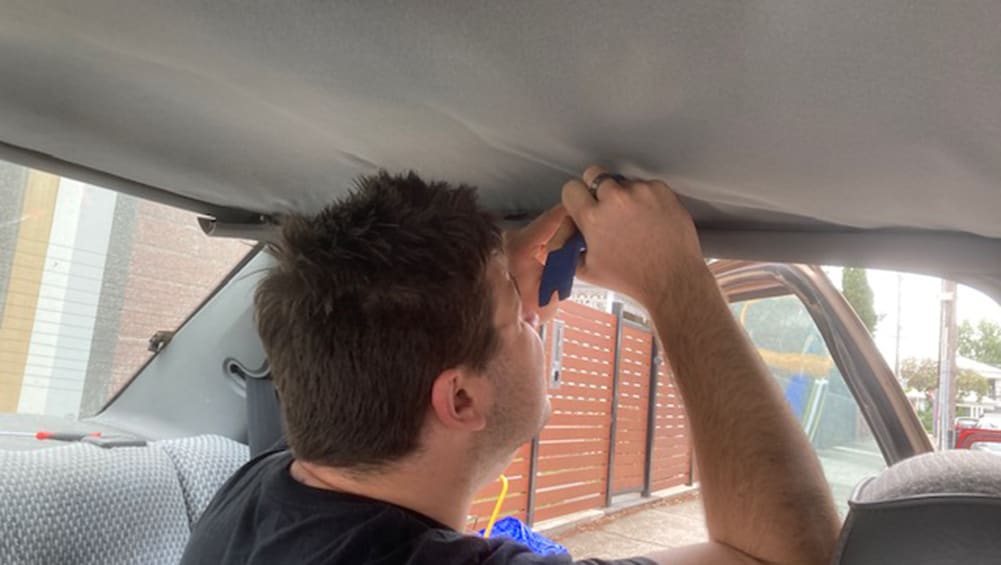
Prepare the Area: Start by cleaning the roof liner with a gentle fabric cleaner to remove any dust, dirt, or grime. This helps ensure a clean surface for the adhesive to adhere to. If there are any loose or detached parts of the fabric, gently trim or cut them away. Be careful not to cut too much or damage the surrounding fabric.
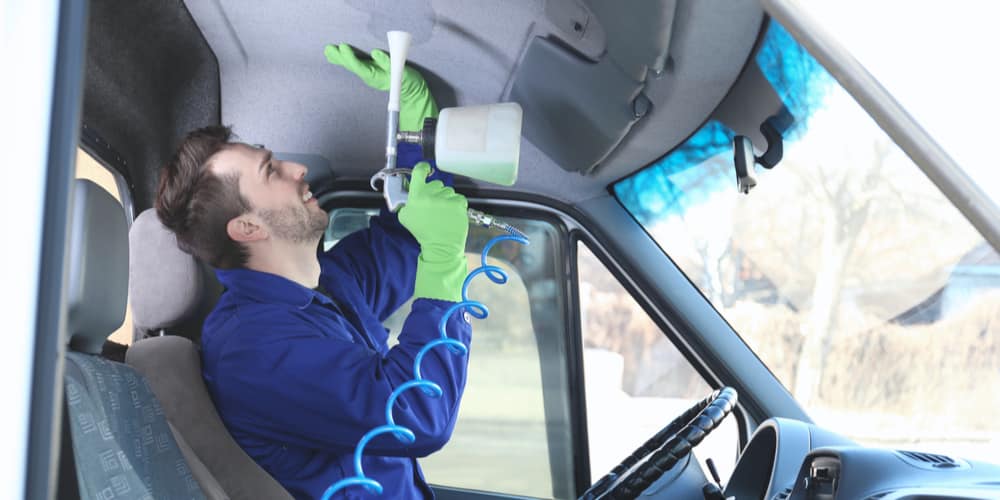
Reattach the Headliner: Purchase a high-quality automotive adhesive that is suitable for headliner repair. These adhesives are often available in aerosol cans for easy application. Carefully lift the sagging portion of the headliner and spray the adhesive onto both the back of the fabric and the corresponding area on the roof. Follow the adhesive manufacturer’s instructions regarding application distance and drying time. Press the fabric firmly onto the roof, smoothing out any wrinkles or bubbles as you go. Make sure the fabric is evenly distributed and aligned with the surrounding areas.
Allow for Proper Drying: Allow sufficient time for the adhesive to dry and bond the headliner to the roof properly. This may take several hours or as specified by the adhesive product. To help with the drying process, consider using light pressure or placing a clean, flat object over the repaired area. This helps ensure a strong bond between the headliner and the roof.
How do you restore a car roof lining?
If your headliner is sagging along the edge of your car ceiling, a quick touch of glue can do the trick. Spray the loose, peeling underside of the headliner with the adhesive, along with the exposed section of ceiling. Wait 5 minutes for the glue to get tacky, and then press the material back into place.
Cleaning and Preparation: Begin by thoroughly cleaning the headliner surface. Use a gentle upholstery cleaner, a soft brush, and a clean, damp cloth to remove any dirt, stains, or contaminants. Be cautious not to oversaturate the headliner, as excessive moisture can cause damage. Allow the headliner to dry completely before proceeding. If there are stubborn stains, consider using a fabric stain remover that is compatible with your headliner material.
Re-Adhering or Replacing the Fabric: If the headliner fabric is sagging or damaged, you have two primary options: re-adhering the existing fabric or replacing it with new material. To re-adhere the fabric, you’ll need an automotive-grade adhesive spray. Carefully peel back the sagging fabric, apply the adhesive to both the fabric and the headliner board, and press the fabric back into place. Work in small sections to ensure even adhesion. Alternatively, for a more comprehensive restoration, you can remove the headliner board, strip off the old fabric, and attach new fabric using the same adhesive method.
Finishing Touches and Prevention: Once the fabric is in place and properly adhered, trim any excess material, and re-install any accessories or fixtures that were removed during the process. Consider using a fabric protector spray to help prevent future stains and damage. It’s essential to follow the product instructions carefully to achieve the best results. Additionally, avoid using harsh cleaning agents in the future to maintain the longevity of the restored headliner.
Why do car roof lining sag?
The simple reason is that the roof lining material is backed with foam, over time with the harsh Australian sun shining down on your roof, this causes the foam to dry out and become brittle. The foam begins to let go from the roof lining panel installed in your car and the roof lining begins sagging and hang down.
Car roof lining, also known as the headliner, may sag over time due to a combination of factors related to materials, age, and environmental conditions. The headliner typically consists of a fabric or foam-backed material that is adhered to the interior roof of the vehicle. Here are three common reasons why car roof linings may sag:
Adhesive Deterioration: The headliner is often attached to the roof using adhesive. Over time, exposure to heat, humidity, and other environmental factors can cause the adhesive to deteriorate. As the adhesive loses its effectiveness, the headliner material may start to detach from the roof, resulting in sagging or drooping.
Material Degradation: The materials used in the headliner, such as foam or fabric, can degrade over time due to exposure to sunlight, heat, and fluctuations in temperature. This degradation can lead to a loss of structural integrity, causing the headliner to sag. Additionally, if the vehicle is frequently parked in direct sunlight or experiences extreme temperature changes, the material may become more susceptible to sagging.
Moisture Infiltration: Water or moisture infiltration into the interior of the car, whether due to leaks, spills, or high humidity, can contribute to headliner sagging. Moisture weakens the adhesive, causing it to lose its grip on the headliner material. This is especially common in areas with high humidity, where the combination of moisture and heat accelerates the breakdown of the adhesive.
How long does it take to fix roof lining?
around 2.5 hours
Car roof lining repair will not keep your vehicle off-road for very long. A typical repair job will take around 2.5 hours. If your vehicle has a sunroof, or any other features that make the standard roof setup slightly more complex, expect it to take a little longer.
The time it takes to fix a roof lining in a car can vary based on several factors, including the complexity of the repair, the type of vehicle, and the skill level of the person performing the task. Here are some general considerations:
Simple Repairs: Minor issues such as small tears, sagging, or detached sections of the roof lining can often be addressed relatively quickly. Simple repairs may involve reattaching the fabric or applying adhesive to secure it back in place. Depending on the size and location of the problem, these repairs may take anywhere from 30 minutes to a couple of hours.
Moderate Repairs: If the damage to the roof lining is more extensive, such as larger tears or significant sagging across the entire headliner, the repair process becomes more involved. This may require removing the headliner, addressing the underlying issues, and reattaching or replacing the fabric. Moderate repairs can take several hours, typically ranging from 3 to 6 hours, depending on the complexity of the work and the specific vehicle model.
Professional Services: For complex or intricate repairs, seeking professional assistance from an automotive upholstery or headliner repair specialist is advisable. Professionals have the expertise, tools, and materials needed to perform high-quality repairs. The duration of professional services can vary, but it may take a day or more, especially if the headliner needs to be removed, repaired, and reinstalled.

What is the inside of the top of your car called?
headliner
A headliner is the material that covers the ceiling of a vehicle, but it does more than hide bare metal with color-coordinated soft fabric. Headliners provide insulation against heat and noise, and they can also hide wiring and hardware for electrical components, antennas and other accessories.
The inside of the top of a car is commonly referred to as the “headliner” or “roof liner.” The headliner is a fabric or material that covers the interior ceiling of the vehicle, providing a finished and aesthetically pleasing appearance. It serves both functional and cosmetic purposes within the car’s interior.
Functional Role: The headliner has practical functions beyond its appearance. It acts as a thermal insulator, helping to regulate the interior temperature of the vehicle by providing some insulation against heat or cold from the outside. Additionally, the headliner helps absorb sound, contributing to a quieter and more comfortable ride by reducing noise from wind, road, and other external sources.
Cosmetic Element: In terms of aesthetics, the headliner contributes to the overall interior design and can enhance the visual appeal of the car. Automakers often choose materials and colors that complement the interior design theme, creating a cohesive and stylish look. The headliner may also house various features such as interior lighting, air vents, or speakers.
Construction: The headliner is typically constructed using materials like fabric, foam, or other composite materials. It is attached to the interior roof structure of the vehicle, covering areas such as the roof beams and insulation. The installation of the headliner involves precision to achieve a smooth and even appearance.
What material to use for car roof lining?
Is your car rooflining sagging or deteriorated due to heat and wear and tear. Replace the roof lining material with high quality foam backed brushed nylon, to update your car interior for a fresh and neat finish.
The material commonly used for car roof linings is headliner fabric. Headliner fabric is a type of material designed to cover the interior roof of a vehicle, providing a clean and finished look. It is essential for both aesthetic and functional reasons, as it conceals the inner workings of the vehicle’s roof, including wiring, insulation, and structural components. Headliner fabric is typically made from materials such as polyester, nylon, or a blend of synthetic fibers.
Polyester is a popular choice for headliner fabric due to its durability, resistance to wrinkles, and ease of maintenance. It is also known for its color retention, ensuring that the fabric retains its appearance over time. Nylon, another common material, is valued for its strength and abrasion resistance. The choice of material depends on factors such as cost, desired aesthetics, and the manufacturer’s preferences.
The headliner fabric is often backed with a foam or fiberglass layer for added insulation and sound absorption. This backing enhances the overall comfort inside the vehicle by providing a level of thermal and acoustic insulation. The combination of durable fabric and a supportive backing helps create a comfortable and visually appealing roof lining in modern cars. Additionally, some manufacturers may offer headliner fabric in various colors and textures to match the interior design and enhance the overall visual appeal of the vehicle’s interior.
What glue can I use for my car?
For example, Loctite Super Glue All Plastics is an ideal glue for plastic car parts, as it will even work with difficult-to-bond plastics such as polyethylene (PE) and polypropylene (PP).
Choosing the right glue for your car is crucial as automotive applications often involve exposure to various conditions such as heat, vibration, and different materials. Several types of glues and adhesives are suitable for different purposes in car repairs or modifications.
Epoxy Resin: Epoxy is a versatile and strong adhesive that works well for bonding a variety of materials, including metal, plastic, and glass. It’s resistant to heat, chemicals, and moisture, making it suitable for applications like fixing interior components, attaching emblems, or bonding plastic and metal surfaces. Epoxy is available in different formulations, so choose one that suits the specific materials and conditions of your car repair.
Automotive Silicone Sealant: Silicone sealants are widely used in automotive applications due to their flexibility, resistance to temperature extremes, and waterproof properties. They are excellent for sealing gaps, bonding materials, and preventing leaks. Automotive silicone sealant can be used on gaskets, windows, and other components that require a flexible and durable seal.
Cyanoacrylate (Super Glue): Super glue, or cyanoacrylate, is a fast-bonding adhesive that works well for smaller, quick repairs. It’s suitable for bonding non-porous surfaces like plastic and metal. However, it may not be the best choice for applications that require flexibility or resistance to high temperatures.
How much does it cost to replace the headliner in a car?
$250.00 to $400.00
Having your car headlining replaced by a professional can cost anywhere from $250.00 to $400.00. However with the right products and some straightforward advice, you can complete this simple project yourself for approximately $90.00 saving yourself a substantial amount of money.
The cost to replace the headliner in a car can vary based on several factors, including the make and model of the vehicle, the type of headliner material, and whether you choose to do the replacement yourself or hire a professional. Generally, the cost can range from a few hundred dollars to over a thousand dollars.
If you decide to take the DIY route, you can save on labor costs but will still need to purchase the necessary materials and tools. Headliner material costs vary, with options such as fabric, foam-backed cloth, or suede affecting the overall price. Additionally, adhesive, foam padding, and any additional components required for installation will contribute to the total cost.
Hiring a professional to replace the headliner can significantly increase the cost due to labor charges. Professional installation ensures a high-quality result, as experienced technicians have the expertise to handle the intricacies of headliner replacement. Additionally, professional services may include warranties or guarantees on their work, providing added assurance.
To get an accurate estimate for your specific vehicle and preferences, it’s recommended to obtain quotes from local auto upholstery shops or service centers. The cost may also vary based on your geographic location and the availability of materials. Overall, while headliner replacement costs can vary, it’s an investment that can enhance the aesthetics and comfort of the car’s interior.
Conclusion
Addressing a sagging roof lining in a car is a manageable task with several effective solutions. The first step involves assessing the extent of the sagging and identifying any underlying issues such as water damage or adhesive failure. Once the root cause is determined, a variety of methods can be employed to rectify the problem. These range from simple DIY fixes such as using fabric adhesive sprays or thumbtacks to more involved techniques like reupholstering the entire roof lining. Regardless of the chosen approach, it’s crucial to ensure that the repairs are conducted carefully to maintain the aesthetics and functionality of the car’s interior.
Moreover, preventative measures can also be taken to mitigate the likelihood of future sagging. Keeping the car’s interior clean and dry, particularly the roof area, can help prevent water damage and mold growth, which are common culprits of sagging roof linings. Additionally, regular inspection and maintenance of the adhesive used to secure the lining can prolong its lifespan and prevent it from deteriorating over time. By implementing these preventive measures, car owners can prolong the longevity of their roof lining and minimize the need for extensive repairs in the future.
In essence, addressing a sagging roof lining in a car requires a combination of diagnosis, repair, and preventive maintenance. With the right approach and attention to detail, car owners can effectively rectify sagging roof linings, restoring both the aesthetics and functionality of their vehicle’s interior. Whether opting for DIY solutions or seeking professional assistance, prioritizing timely action can help prevent further damage and ensure a comfortable and visually pleasing driving experience for years to come.